Difference between revisions of "Projets:Lab:2015:SolderStation:FirmwareEnglish"
(→Firmware) |
|||
| Line 80: | Line 80: | ||
Note that it is possible to check the firmware during operation by opening a "serial console" window (Ctrl-Shift-M). The temperature set and the actual temperature of the solder tip appears in scrolling mode. | Note that it is possible to check the firmware during operation by opening a "serial console" window (Ctrl-Shift-M). The temperature set and the actual temperature of the solder tip appears in scrolling mode. | ||
| − | |||
| − | |||
Revision as of 09:47, 3 July 2015
  Six Wiki pages and two files are related to this manual:

 *  Les instructions de chargement du firmware (version Française)
 *  Une presentation générale de l'appareil (version Française)
 *  Le guide de montage illustré (version Française)
 * File:BOM Station CMS.xls The Bill of Material, xls format
 * File:BOM Montage.xls The Assembly BoM, xls format

 *  Loading the firmware, (English version)
 *  Assembly Manual, (English version)
 *  A quick general presentation of the solder station(English version)
Firmware
The Arduino code supervising the temperature regulation is the work of Yann "Dyblast", inspired by the work of Martin “DC3MKB” Kumm. Yann has done a fantastic job cleaning and optimizing the code, including significant changes. And especially:
   * A permanent control routine of the PWM output with a safety function preventing any thermal overrun
     and giving the user an idea of the duty cycle in progress
   * An optional color LCD extension that shows both the effective temperature, the param. Set temperature
     and the precise pwm ration.. all that stuff in real time.
   * The ability to choose several hardware platforms ranging from the original DC3MKB to the Electrolab PCB
     (different from the original version because of miniaturization given by the "Nano" and routing design simplicity)
   * The use of a rotary encoder for the temperature setting, considered more ergonomic than the two "up-down"
     pushbuttons (the Display PCB allows both supports: up/down buttons and rotary encoder)
The sources are available on Github, to the following address
https://github.com/diorcety/SolderStation/tree/master/SolderStation
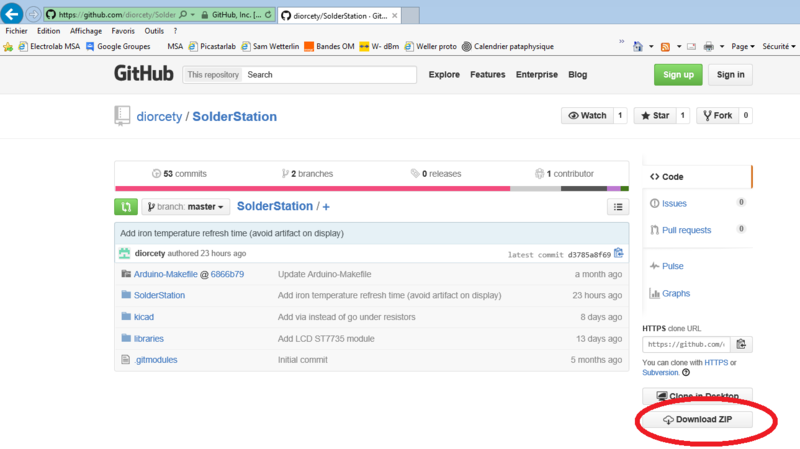
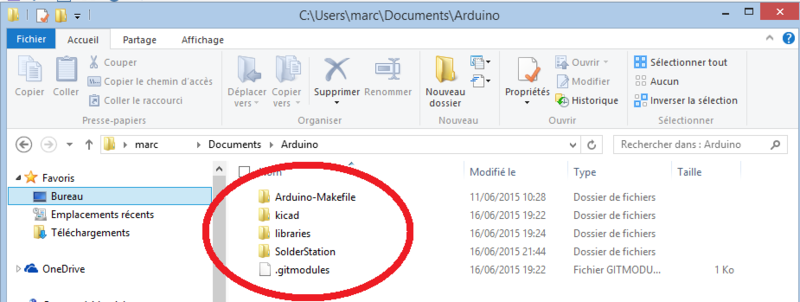
The "hardware guys" who don’t want to deal with computer things must download the entire contents of this repository (button "Dowload Zip" located on the right-hand side of the Github web page) and extract the archive into the User folder / Documents / Arduino / (thus for Windows users). This operation will create 4 separate subdirectories. By default, this path allows the Arduino development interface to automatically retrieve the contents of the "libraries" folder
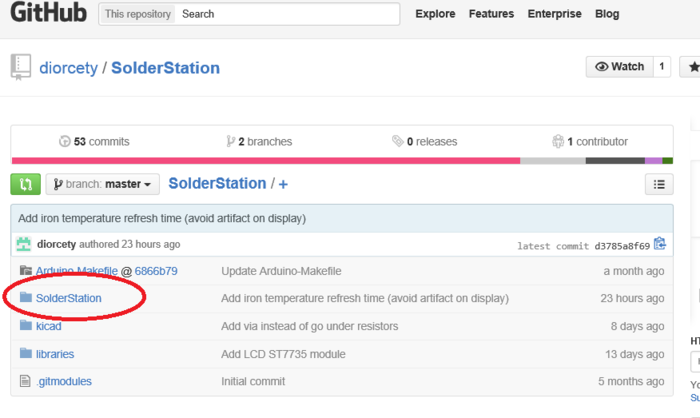
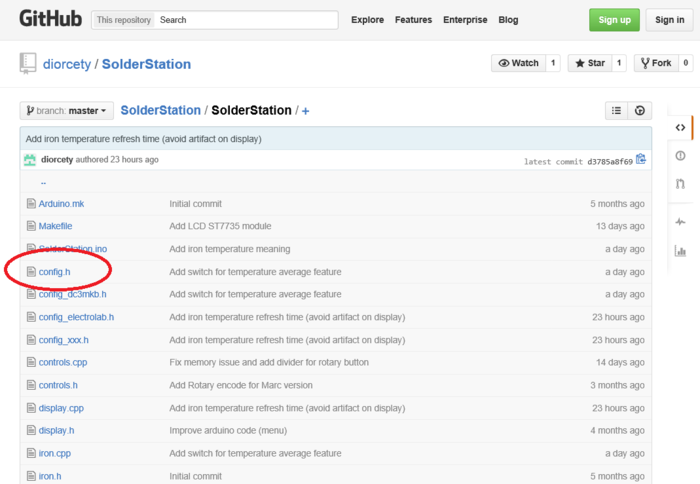
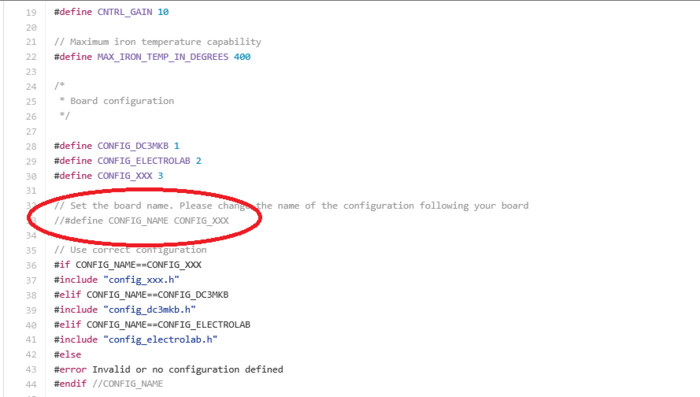
Before starting the program compilation, edit the config.h file in the directory SolderStation (notepad ++ or any other editor)
Step 1
Step 2
Step 3
... And change the line
// #define Config_name CONFIG_XXX
in
#define config_name CONFIG_ELECTROLAB
In other words, "uncomment" line and specify the desired configuration.
FYI (lines 28 to 30), "CONFIG_DC3MKB" compile the original code by Martin Kumm (Arduino Uno and piggy-back and the display incorporating power electronics), while CONFIG_XXX matches the configuration of Yann " Dyblast "(pinout similar to that of DC3MKB but incompatible with that of Electrolab and LCD color display of the temperature and set points). A third version "Electrolab with color LCD display" is under developpement.
Save your change
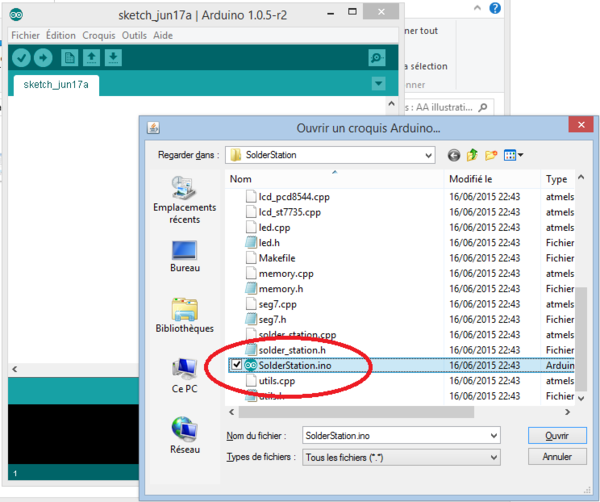
Load the program into the Arduino IDE by double clicking on the file
- User / Documents / Arduino / SolderStation.ino
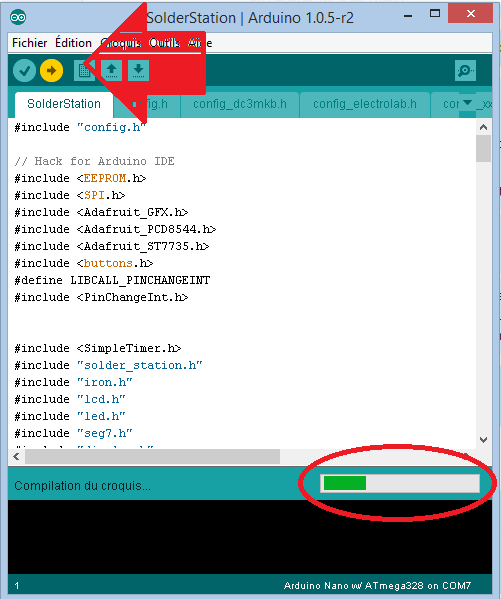
Compile and download your firmware in Arduino (arrow icon "upload")
Note that it is possible to check the firmware during operation by opening a "serial console" window (Ctrl-Shift-M). The temperature set and the actual temperature of the solder tip appears in scrolling mode.
