Difference between revisions of "Projets:Perso:2011:Motorshield:assembly"
(→Step 1: paste) |
|||
| Line 10: | Line 10: | ||
So this is the main description for step 1. Bla bla bla toubidoubidouwhaaaaa long text long text long text long text long text long text long text long text long text long text long text long text long text long text long text long text long text long text long text long text long text long text long text long text long text long text long text long text long text long text long text long text long text long text long text long text long text long text long text long text long text long text long text long text long text long text | So this is the main description for step 1. Bla bla bla toubidoubidouwhaaaaa long text long text long text long text long text long text long text long text long text long text long text long text long text long text long text long text long text long text long text long text long text long text long text long text long text long text long text long text long text long text long text long text long text long text long text long text long text long text long text long text long text long text long text long text long text long text | ||
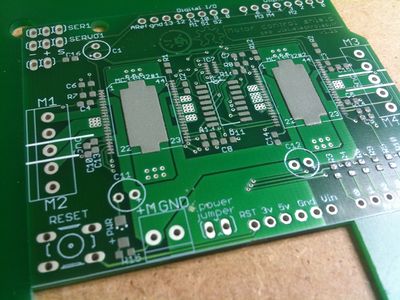
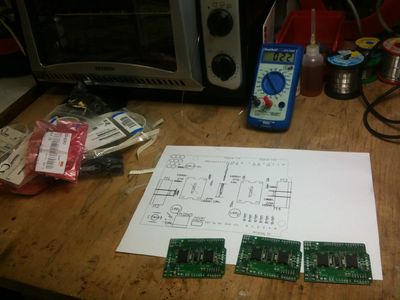
| − | [[File:Motorshield-step10.jpg| | + | [[File:Motorshield-step10.jpg|400px|center]] |
<center>Let's stencil some paste !</center> | <center>Let's stencil some paste !</center> | ||
| Line 23: | Line 23: | ||
! !! | ! !! | ||
|- | |- | ||
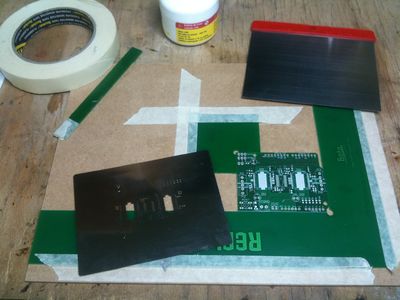
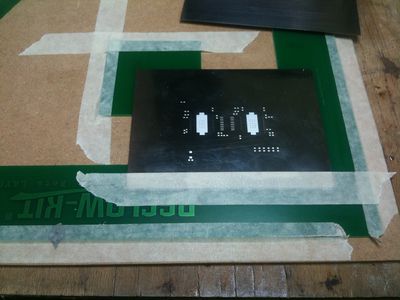
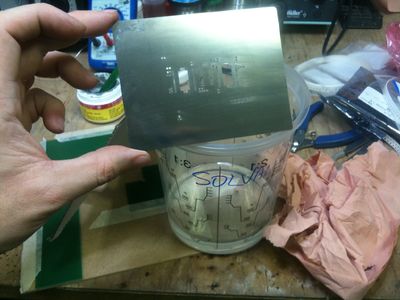
| − | | [[File:Motorshield-step11.jpg| | + | | [[File:Motorshield-step11.jpg|400px]] || Substep 1.1: ajuster le stencil sur le PCB. Bien s'appliquer sinon ca marche pô. Vérifier, s'y reprendre à 3 fois si nécessaire. |
|- | |- | ||
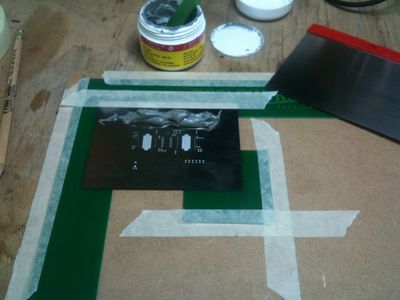
| − | | [[File:Motorshield-step12.jpg| | + | | [[File:Motorshield-step12.jpg|400px]] || Substep 1.2: déposer la pate (en quantité largement suffisante, le surplus sera pas perdu, et avec pas assez, ca juste marche pas). Penser à la touiller avant. Gaffe, c'est de la saloperie ! Notez le subtil retournement de situation... |
|- | |- | ||
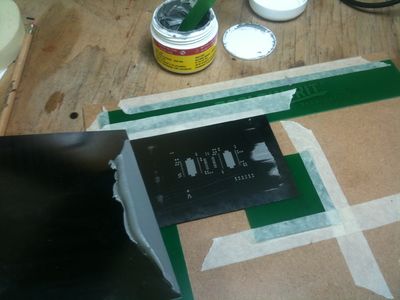
| − | | [[File:Motorshield-step13.jpg| | + | | [[File:Motorshield-step13.jpg|400px]] || Substep 1.3: un coup de raclette et PAN ! Bien appuyer comme un goret, de partout, angle de 21.782° entre la raclette & le support. |
|- | |- | ||
| − | | [[File:Motorshield-step14.jpg| | + | | [[File:Motorshield-step14.jpg|400px]] || Substep 1.4: tadaaaa ! On vérifie bien qu'on a pas fait trop de la merde... sinon, faut recommencer ! |
|- | |- | ||
| − | | [[File:Motorshield-step15.jpg| | + | | [[File:Motorshield-step15.jpg|400px]] || Substep 1.5: on nettoie son stencil entre chaque utilisation, sinon saypataupe, et ca n'en vaut pas la peine. |
|- | |- | ||
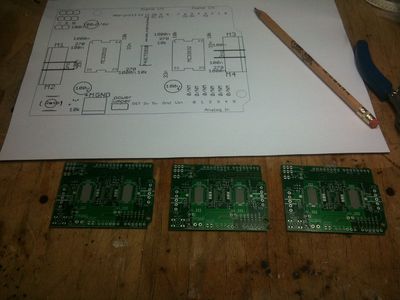
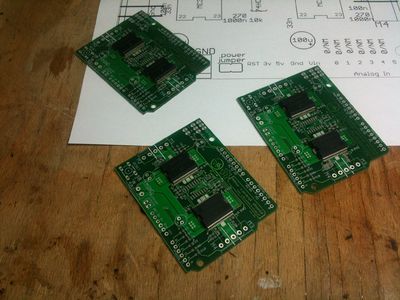
| − | | [[File:Motorshield-step16.jpg| | + | | [[File:Motorshield-step16.jpg|400px]] || Substep 1.6: Trois d'un coup ! Remarquez que yen a une nickel, une correcte et une pas top. |
|- | |- | ||
! !! | ! !! | ||
| Line 53: | Line 53: | ||
! !! | ! !! | ||
|- | |- | ||
| − | | [[File:Motorshield-step21.jpg]] || Substep 2.1: on pose les composants les plus délicats en premier. En cas d'epic fail, on peut encore faire demi tour... | + | | [[File:Motorshield-step21.jpg|400px]] || Substep 2.1: on pose les composants les plus délicats en premier. En cas d'epic fail, on peut encore faire demi tour... |
|- | |- | ||
| − | | [[File:Motorshield-step22.jpg]] || Substep 2.2: mais en fait, pas d'epic fail :) Notez qu'on peut foirouiller le positionnement, ca se corrige ensuite. | + | | [[File:Motorshield-step22.jpg|400px]] || Substep 2.2: mais en fait, pas d'epic fail :) Notez qu'on peut foirouiller le positionnement, ca se corrige ensuite. |
|- | |- | ||
| − | | [[File:Motorshield-step23.jpg]] || Substep 2.3: on prépare du passif: compter le bon nombre, mettre le sac "fait" à gauche. Repérer les emplacements. Vérifier la polarité. | + | | [[File:Motorshield-step23.jpg|400px]] || Substep 2.3: on prépare du passif: compter le bon nombre, mettre le sac "fait" à gauche. Repérer les emplacements. Vérifier la polarité. |
|- | |- | ||
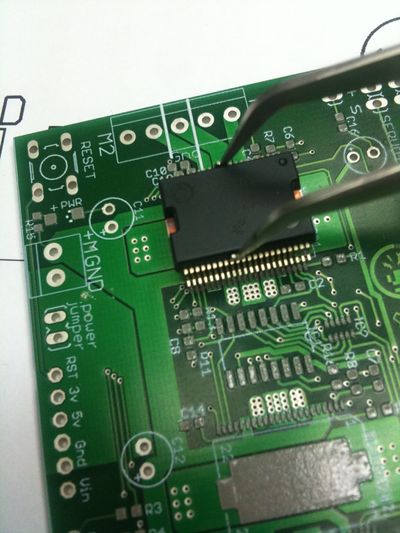
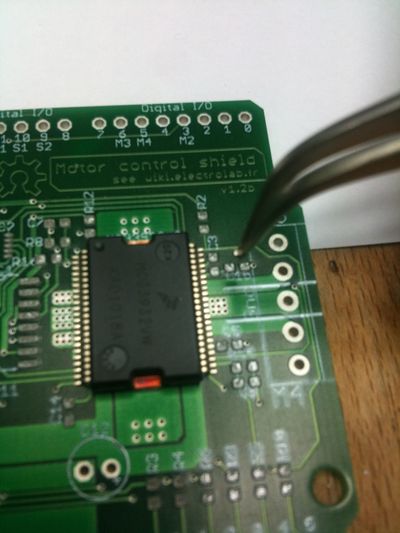
| − | | [[File:Motorshield-step24.jpg]] || Substep 2.4: on approche le composant avec la brucelle... notez que changer l'orientation de la carte pour se simplifier la vie n'est pas interdit, mais recommandé ! | + | | [[File:Motorshield-step24.jpg|400px]] || Substep 2.4: on approche le composant avec la brucelle... notez que changer l'orientation de la carte pour se simplifier la vie n'est pas interdit, mais recommandé ! |
|- | |- | ||
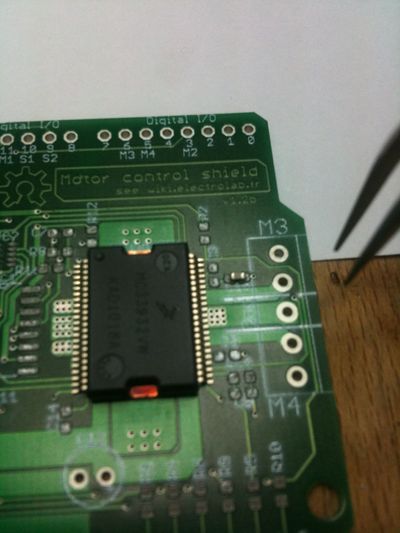
| − | | [[File:Motorshield-step25.jpg]] || Substep 2.5: On se détend, on relache, et c'est fait ! Lui appuyer le gras pour bien le coller à la pate est une bonne idée (voir les fails suivants). Le premier d'une série... | + | | [[File:Motorshield-step25.jpg|400px]] || Substep 2.5: On se détend, on relache, et c'est fait ! Lui appuyer le gras pour bien le coller à la pate est une bonne idée (voir les fails suivants). Le premier d'une série... |
|- | |- | ||
| − | | [[File:Motorshield-step26.jpg]] || Substep 2.6: Pour la suite de cette valeur, tout pareil... | + | | [[File:Motorshield-step26.jpg|400px]] || Substep 2.6: Pour la suite de cette valeur, tout pareil... |
|- | |- | ||
| − | | [[File:Motorshield-step27.jpg]] || Substep 2.7: Et d'ailleurs, pour tous les autres, tout pareil... on comprend vite pourquoi on laisse ca aux robots ! | + | | [[File:Motorshield-step27.jpg|400px]] || Substep 2.7: Et d'ailleurs, pour tous les autres, tout pareil... on comprend vite pourquoi on laisse ca aux robots ! |
|- | |- | ||
| − | | [[File:Motorshield-step28.jpg]] || Substep 2.8: Prete à passer au four ! tout n'est pas aligné parfait, mais on s'en cogne... ca va s'aligner à la cuisson. | + | | [[File:Motorshield-step28.jpg|400px]] || Substep 2.8: Prete à passer au four ! tout n'est pas aligné parfait, mais on s'en cogne... ca va s'aligner à la cuisson. |
|- | |- | ||
! !! | ! !! | ||
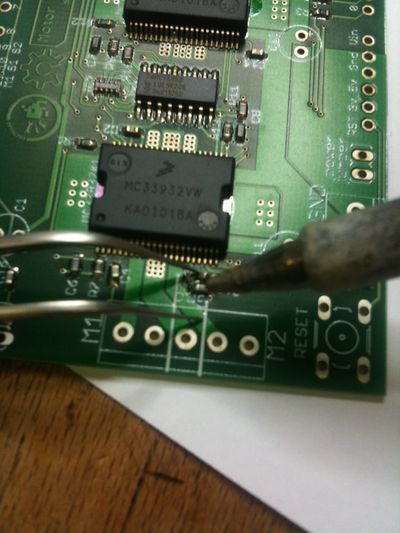
| Line 84: | Line 84: | ||
! !! | ! !! | ||
|- | |- | ||
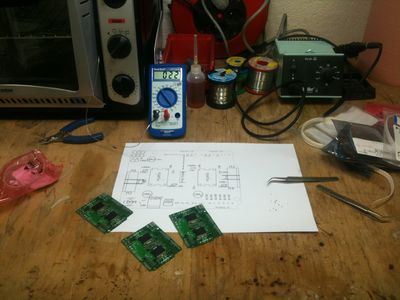
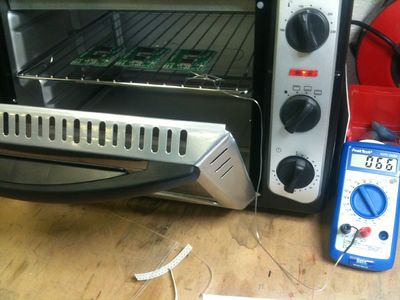
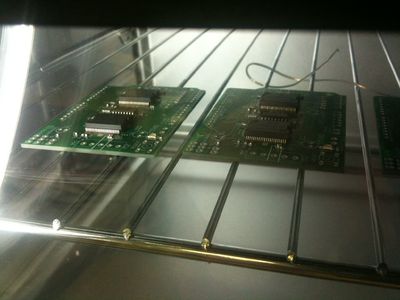
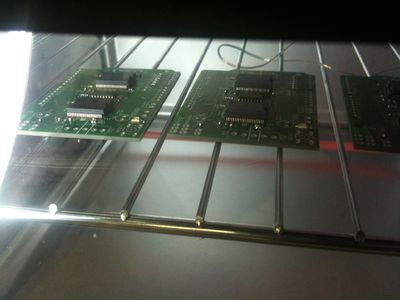
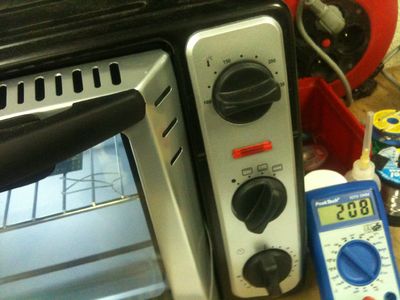
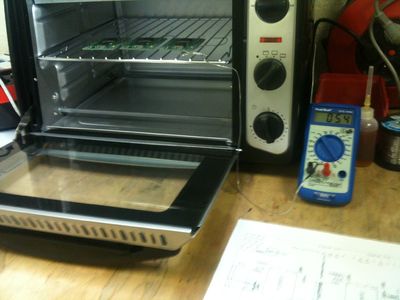
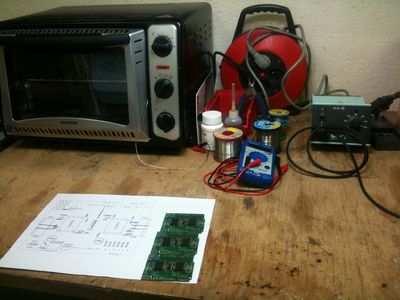
| − | | [[File:Motorshield-step31.jpg]] || Substep 3.1: Les cartes disposées au four, cote à cote. Température à 60°C, tout va bien, on peut/doit laisser qq temps comme ca. | + | | [[File:Motorshield-step31.jpg|400px]] || Substep 3.1: Les cartes disposées au four, cote à cote. Température à 60°C, tout va bien, on peut/doit laisser qq temps comme ca. |
|- | |- | ||
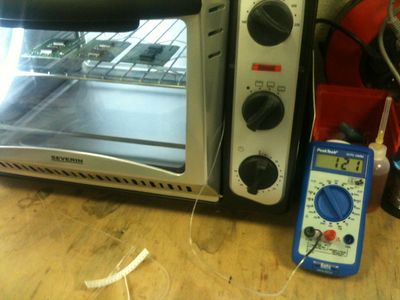
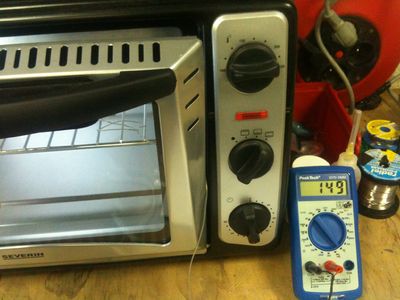
| − | | [[File:Motorshield-step32.jpg]] || Substep 3.2: 121°C : certains composants tiennent le choc longtemps, pas trop critique. Temperature pallier, on y va progressivement. ramp up. | + | | [[File:Motorshield-step32.jpg|400px]] || Substep 3.2: 121°C : certains composants tiennent le choc longtemps, pas trop critique. Temperature pallier, on y va progressivement. ramp up. |
|- | |- | ||
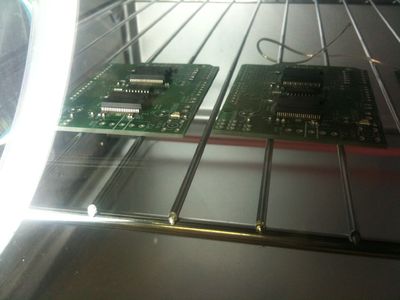
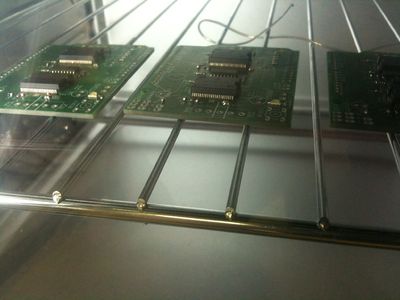
| − | | [[File:Motorshield-step33.jpg]] || Substep 3.3: (close up) | + | | [[File:Motorshield-step33.jpg|400px]] || Substep 3.3: (close up) |
|- | |- | ||
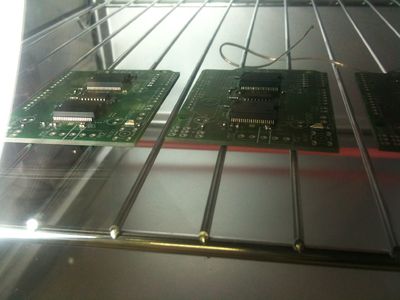
| − | | [[File:Motorshield-step34.jpg]] || Substep 3.4: 191°C : ca commence à chauffer: faut commencer à compter ! Mais rien ne fond... ramp up lent... et pan, on met plein gaz ! en chronometrant (de tete et avec les yeux, surtout) | + | | [[File:Motorshield-step34.jpg|400px]] || Substep 3.4: 191°C : ca commence à chauffer: faut commencer à compter ! Mais rien ne fond... ramp up lent... et pan, on met plein gaz ! en chronometrant (de tete et avec les yeux, surtout) |
|- | |- | ||
| − | | [[File:Motorshield-step35.jpg]] || Substep 3.5: 215°C : ca fond ! ca commence, en tout ca. Là, faut clairement compter les secondes sous peine de tout cramer... | + | | [[File:Motorshield-step35.jpg|400px]] || Substep 3.5: 215°C : ca fond ! ca commence, en tout ca. Là, faut clairement compter les secondes sous peine de tout cramer... |
|- | |- | ||
| − | | [[File:Motorshield-step36.jpg]] || Substep 3.6: 230°C : ca commence à avoir bien fondu de partout... on coupe tout ! L'inertie thermique fait que ca monte encore un peu... | + | | [[File:Motorshield-step36.jpg|400px]] || Substep 3.6: 230°C : ca commence à avoir bien fondu de partout... on coupe tout ! L'inertie thermique fait que ca monte encore un peu... |
|- | |- | ||
| − | | [[File:Motorshield-step37.jpg]] || Substep 3.7: 230°C+ : on laisse finir de cuire/fondre de partout... | + | | [[File:Motorshield-step37.jpg|400px]] || Substep 3.7: 230°C+ : on laisse finir de cuire/fondre de partout... |
|- | |- | ||
| − | | [[File:Motorshield-step38.jpg]] || Substep 3.8: on entre ouvre LEGEREMENT (voire juste de quoi échapper un poil de chaud) le four, pour ramp down pas trop brutal (2°C/s). | + | | [[File:Motorshield-step38.jpg|400px]] || Substep 3.8: on entre ouvre LEGEREMENT (voire juste de quoi échapper un poil de chaud) le four, pour ramp down pas trop brutal (2°C/s). |
|- | |- | ||
| − | | [[File:Motorshield-step39.jpg]] || Substep 3.9: four entrouvert, 150°C on revient dans le supportable sur la durée... | + | | [[File:Motorshield-step39.jpg|400px]] || Substep 3.9: four entrouvert, 150°C on revient dans le supportable sur la durée... |
|- | |- | ||
| − | | [[File:Motorshield-step310.jpg]] || Substep 3.10: 54°C, four ouvert: c'est pret ! | + | | [[File:Motorshield-step310.jpg|400px]] || Substep 3.10: 54°C, four ouvert: c'est pret ! |
|- | |- | ||
! !! | ! !! | ||
| Line 111: | Line 111: | ||
So this is the main description for step 4. Bla bla bla toubidoubidouwhaaaaa long text long text long text long text long text long text long text long text long text long text long text long text long text long text long text long text long text long text long text long text long text long text long text long text long text long text long text long text long text long text long text long text long text long text long text long text long text long text long text long text long text long text long text long text long text long text | So this is the main description for step 4. Bla bla bla toubidoubidouwhaaaaa long text long text long text long text long text long text long text long text long text long text long text long text long text long text long text long text long text long text long text long text long text long text long text long text long text long text long text long text long text long text long text long text long text long text long text long text long text long text long text long text long text long text long text long text long text long text | ||
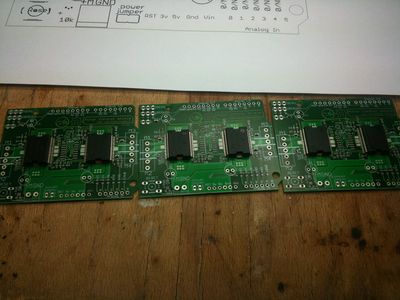
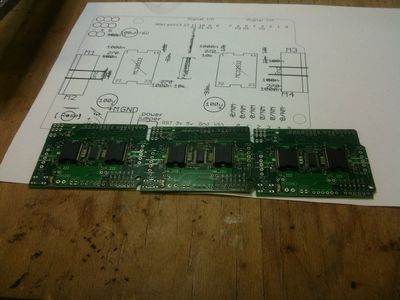
| − | [[File:Motorshield-step40.jpg| | + | [[File:Motorshield-step40.jpg|400px|center]] |
<center>toutes belles sorties du four... mais est-ce qu'elles sont bonnes ?</center> | <center>toutes belles sorties du four... mais est-ce qu'elles sont bonnes ?</center> | ||
| Line 123: | Line 123: | ||
! !! | ! !! | ||
|- | |- | ||
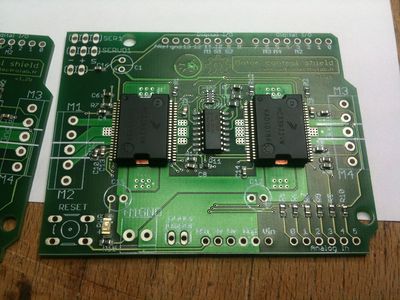
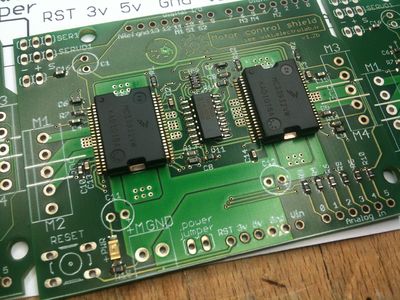
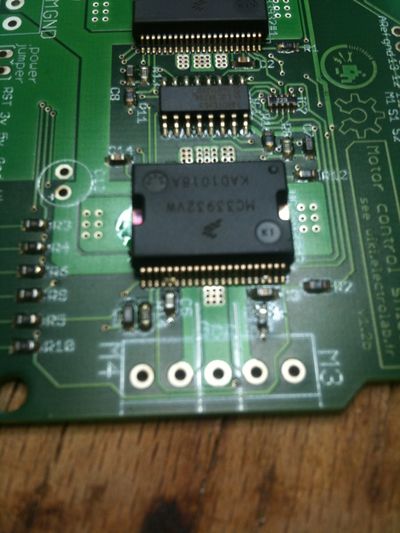
| − | | [[File:Motorshield-step41.jpg]] || Substep 4.1: close up... yabon ! Celle là, c'est la soignée à donf, ca se voit... | + | | [[File:Motorshield-step41.jpg|400px]] || Substep 4.1: close up... yabon ! Celle là, c'est la soignée à donf, ca se voit... |
|- | |- | ||
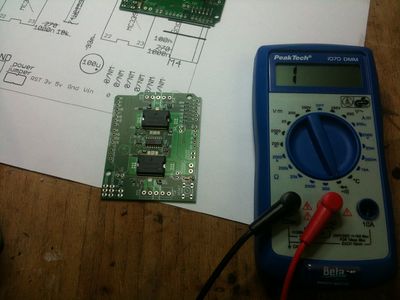
| − | | [[File:Motorshield-step42.jpg]] || Substep 4.2: testeur de conti: on va vérifier que tout est bon. En priorité GND & alim, parce que poupouf et proba. | + | | [[File:Motorshield-step42.jpg|400px]] || Substep 4.2: testeur de conti: on va vérifier que tout est bon. En priorité GND & alim, parce que poupouf et proba. |
|- | |- | ||
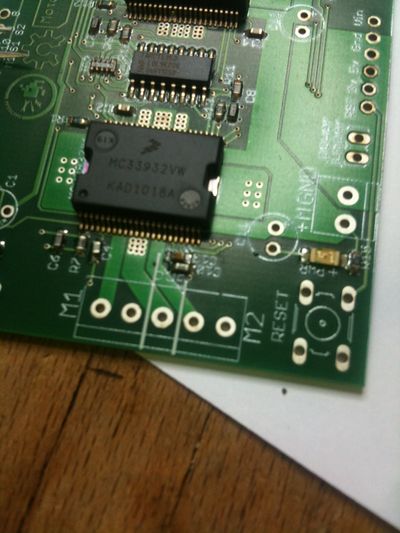
| − | | [[File:Motorshield-step43.jpg]] || Substep 4.3: un passif pas bien appuyé dans la pate: il a eu une érection! Pas grave, brucelle, fer, et hop on le remet dans le droit chemin. | + | | [[File:Motorshield-step43.jpg|400px]] || Substep 4.3: un passif pas bien appuyé dans la pate: il a eu une érection! Pas grave, brucelle, fer, et hop on le remet dans le droit chemin. |
|- | |- | ||
| − | | [[File:Motorshield-step44.jpg]] || Substep 4.4: ni vu ni connu ! | + | | [[File:Motorshield-step44.jpg|400px]] || Substep 4.4: ni vu ni connu ! |
|- | |- | ||
| − | | [[File:Motorshield-step45.jpg]] || Substep 4.5: arf, sur une des cartes faite en gorret, ya des ponts ! vérifier schématique/routage (certains sont "normaux" ou pas genants". Ici, va falloir intervenir... | + | | [[File:Motorshield-step45.jpg|400px]] || Substep 4.5: arf, sur une des cartes faite en gorret, ya des ponts ! vérifier schématique/routage (certains sont "normaux" ou pas genants". Ici, va falloir intervenir... |
|- | |- | ||
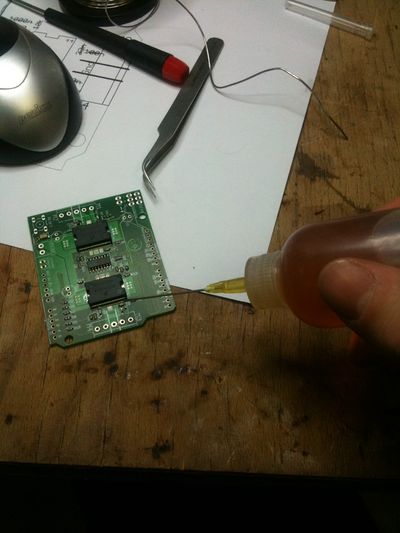
| − | | [[File:Motorshield-step46.jpg]] || Substep 4.6: on met du flux avec notre superbe dispenser DIY | + | | [[File:Motorshield-step46.jpg|400px]] || Substep 4.6: on met du flux avec notre superbe dispenser DIY |
|- | |- | ||
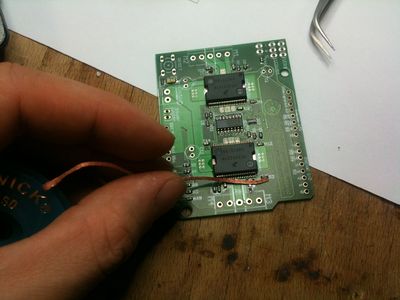
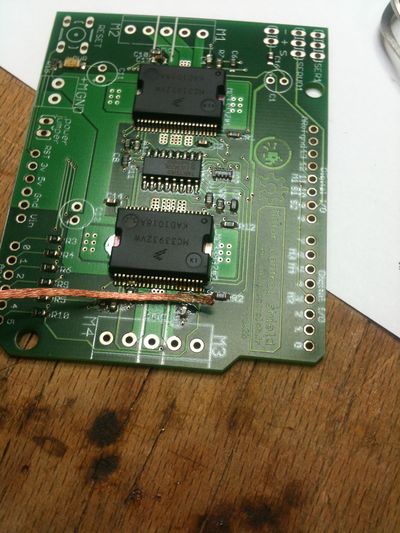
| − | | [[File:Motorshield-step47.jpg]] || Substep 4.7: on prépare la tresse: fine, face aux pinouilles. on va chauffer, et ca fait éponge ! | + | | [[File:Motorshield-step47.jpg|400px]] || Substep 4.7: on prépare la tresse: fine, face aux pinouilles. on va chauffer, et ca fait éponge ! |
|- | |- | ||
| − | | [[File:Motorshield-step48.jpg]] || Substep 4.8: pas besoin d'insister beaucoup ; pas d'effort perpendiculaire aux pins. Vérifier à la bino & au testeur ce que ca donne. Ajouter flux si nécessaire. En cas de panique à bord, ajouter de l'étain aide à ce que le tout vienne ensuite. | + | | [[File:Motorshield-step48.jpg|400px]] || Substep 4.8: pas besoin d'insister beaucoup ; pas d'effort perpendiculaire aux pins. Vérifier à la bino & au testeur ce que ca donne. Ajouter flux si nécessaire. En cas de panique à bord, ajouter de l'étain aide à ce que le tout vienne ensuite. |
|- | |- | ||
| − | | [[File:Motorshield-step49.jpg]] || Substep 4.9: C'est tout de suite plus moche... comme quoi, autant bien mettre la pate au départ ! | + | | [[File:Motorshield-step49.jpg|400px]] || Substep 4.9: C'est tout de suite plus moche... comme quoi, autant bien mettre la pate au départ ! |
|- | |- | ||
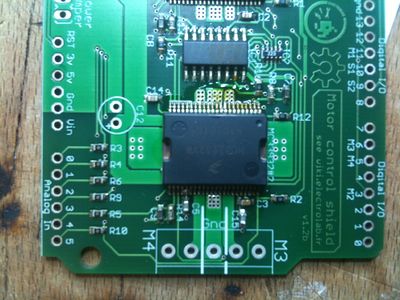
| − | | [[File:Motorshield-step410.jpg]] || Substep 4.10: C'est fini ! On fait le rework de partout & on teste la conti + inspection optique. Les pros ont des bancs de test, mais nous... on peut souder le reste des composants de manière traditionnelle, retester, puis mettre sous tension & tester en fonctionnel. | + | | [[File:Motorshield-step410.jpg|400px]] || Substep 4.10: C'est fini ! On fait le rework de partout & on teste la conti + inspection optique. Les pros ont des bancs de test, mais nous... on peut souder le reste des composants de manière traditionnelle, retester, puis mettre sous tension & tester en fonctionnel. |
|- | |- | ||
! !! | ! !! | ||
|} | |} | ||
Revision as of 01:33, 14 December 2011
quick introduction maybe..?
get me back from here ! I can't hit return myself !
vivi, les pics arrivent, mais c'est long à uploader...
Contents
Step 0: avant de commencer
matos nécessaire, etc etc etc
Step 1: paste
So this is the main description for step 1. Bla bla bla toubidoubidouwhaaaaa long text long text long text long text long text long text long text long text long text long text long text long text long text long text long text long text long text long text long text long text long text long text long text long text long text long text long text long text long text long text long text long text long text long text long text long text long text long text long text long text long text long text long text long text long text long text
Bla bla bla toubidoubidouwhaaaaa long text:
- long text long text long text long text long
- text long text long text long text long text long text long text long text long text long text long text long text long text long text long text long text long text long text long text long text long text long text long text long
- text long text long text long text long text long text long text long text long text long text long text long text long text long text long text long text long text long text
Step 2: components
So this is the main description for step 2. Bla bla bla toubidoubidouwhaaaaa long text long text long text long text long text long text long text long text long text long text long text long text long text long text long text long text long text long text long text long text long text long text long text long text long text long text long text long text long text long text long text long text long text long text long text long text long text long text long text long text long text long text long text long text long text long text
Bla bla bla toubidoubidouwhaaaaa long text:
- long text long text long text long text long
- text long text long text long text long text long text long text long text long text long text long text long text long text long text long text long text long text long text long text long text long text long text long text long
- text long text long text long text long text long text long text long text long text long text long text long text long text long text long text long text long text long text
Step 3: four
So this is the main description for step 3. Bla bla bla toubidoubidouwhaaaaa long text long text long text long text long text long text long text long text long text long text long text long text long text long text long text long text long text long text long text long text long text long text long text long text long text long text long text long text long text long text long text long text long text long text long text long text long text long text long text long text long text long text long text long text long text long text
Bla bla bla toubidoubidouwhaaaaa long text:
- long text long text long text long text long
- text long text long text long text long text long text long text long text long text long text long text long text long text long text long text long text long text long text long text long text long text long text long text long
- text long text long text long text long text long text long text long text long text long text long text long text long text long text long text long text long text long text
Step 4: test & rework
So this is the main description for step 4. Bla bla bla toubidoubidouwhaaaaa long text long text long text long text long text long text long text long text long text long text long text long text long text long text long text long text long text long text long text long text long text long text long text long text long text long text long text long text long text long text long text long text long text long text long text long text long text long text long text long text long text long text long text long text long text long text
Bla bla bla toubidoubidouwhaaaaa long text:
- long text long text long text long text long
- text long text long text long text long text long text long text long text long text long text long text long text long text long text long text long text long text long text long text long text long text long text long text long
- text long text long text long text long text long text long text long text long text long text long text long text long text long text long text long text long text long text
